Content Creation Starter Kit: Budget-Friendly Tools to Launch Fast
Introduction:
Starting your content creation journey doesn’t require expensive tools or fancy software. What you need is a simple, reliable system and a few well-chosen tools that support your goals from day one.
This guide is built for bloggers, creators, and digital business owners who want to launch quickly, stay organized, and grow without overspending. Whether you’re drafting blog posts, filming short-form videos, or designing lead magnets, the tools in this starter kit are beginner-friendly, budget-conscious, and built for speed.
You’ll discover which free tools can help you research faster, stay consistent, and create content that gets results. No fluff, no wasted time – just what you need to get your first content system off the ground and running smoothly.
Disclosure: When you buy through a link on this site, I may earn a commission at no extra cost to you.
Step 1: Get Clear on Your Content Creation Goals
Before choosing tools or building systems, take some time to define exactly what you want your content to achieve. Clarity helps you avoid wasting time on features or platforms you don’t need.
Questions to Ask Yourself:
- What kind of content will you create first? Blog, video, email, social
- What’s your main goal right now? Traffic, list growth, product validation
- How often can you realistically publish? Daily, weekly, twice a month
- Who are you creating content for, and what problem are you solving?
Once you’re clear on these basics, it becomes easier to choose tools that support your mission without distractions.
Pro Tip: Write one sentence that defines your content goal. Example: I’m creating one blog post and two social posts each week to grow my email list.
Use Asana to plan your content goals and track your progress. Its flexible dashboard lets you build a personalized plan you’ll actually stick to.
“Want to map out your content goals and track progress in one place? Try Asana here for simple, goal-driven planning you’ll stick to!”
Get Started Here! Asana
Step 2: Use ChatGPT Free for Research and Outlining
If you’re stuck staring at a blank page, ChatGPT’s free version can help you break through. It’s one of the fastest ways to brainstorm ideas, research topics, and build outlines.
What You Can Do With ChatGPT Free:
- Ask for blog or video ideas based on your niche
- Create outlines from scratch by entering a target topic
- Summarize articles, search intent, or competing posts
- Turn messy thoughts into a structured plan
- Generate SEO-friendly headings and subtopics
You don’t need advanced prompts. Just type in what you want to create, and refine the results with follow-up questions. It’s like having a personal content assistant, without the cost.
Pro Tip: Create a swipe file of your favourite ChatGPT prompts. Use them as repeatable tools for blog planning, content repurposing, or social media scripting.
ChatGPT’s free tier helps you research and plan content faster, perfect for creators who want results without a steep learning curve.
“Want to research topics and build outlines in minutes? Try ChatGPT Free here for fast, beginner-friendly content planning!”
Get Started Here! ChatGPT
Step 3: Draft Faster With Google Docs and Voice Typing
Typing out blog posts or video scripts from scratch can be time-consuming. Google Docs offers a simple way to speed up your writing, especially when you use voice typing to get your ideas out fast.
Why Google Docs Is a Great Free Drafting Tool:
- Real-time autosave and cloud access
- Easy to format for blog posts or email sequences
- Shareable links for feedback or editing
- Compatible with tools like Grammarly or SurferSEO
- Voice Typing lets you speak your content and edit it later
Talking through your ideas can help you overcome perfectionism and build momentum. You can always revise once the core message is down.
Pro Tip: Use voice typing for first drafts, especially if you’re explaining something you know well. It’s one of the fastest ways to generate raw content.
Pair Google Docs with Grammarly’s browser extension for real-time editing.
“Want to write faster and polish as you go? Try Grammarly Pro here for real-time editing that keeps your drafts clear and error-free!”
Get Started Here! Grammarly Pro
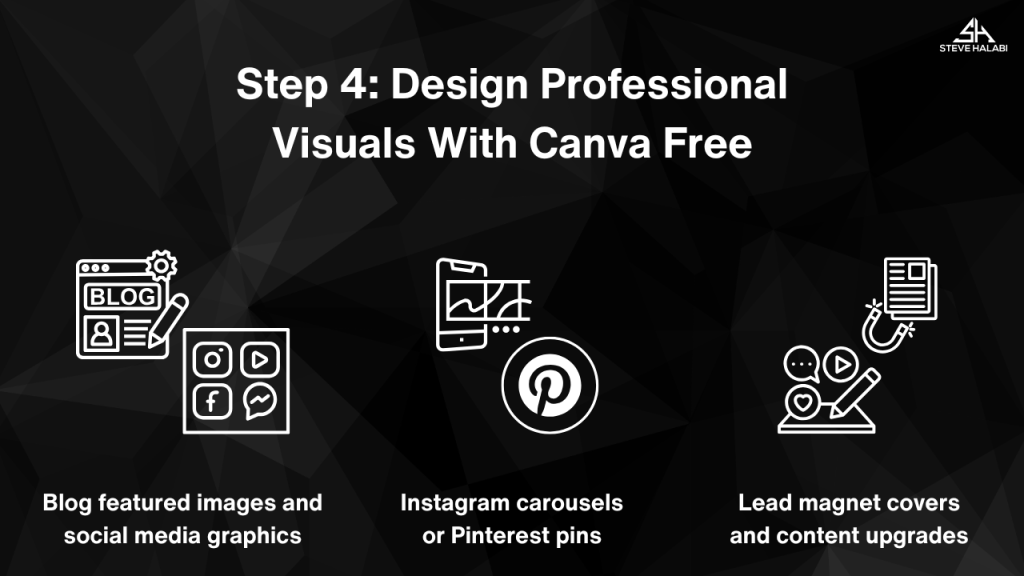
Step 4: Design Professional Visuals With Canva
Visuals matter. They make your content more engaging, shareable, and trustworthy. Canva gives you everything you need to create professional-looking graphics, even if you have zero design experience.
What You Can Create in Canva:
- Blog featured images and social media graphics
- Instagram carousels or Pinterest pins
- YouTube thumbnails and video overlays
- Lead magnet covers and content upgrades
- Logos and brand kits
The drag-and-drop interface makes it easy to customize templates. You can start with pre-built layouts and add your own colors, fonts, and photos.
Pro Tip: Pick 2 or 3 templates and reuse them for all your content. Consistency builds brand recognition and saves time with every new post.
Canva provides access to hundreds of templates, graphics, and tools to help your blog or brand look polished.
“Want to create polished visuals without design skills? Try Canva Pro here for ready-made templates you can customize in minutes!”
Get Started Here! Canva Pro
Step 5: Organize Ideas and Tasks in Trello
A good content system keeps you focused, and Trello is one of the simplest tools for doing just that. It’s a visual task board that helps you track ideas, draft posts, and manage your workflow.
How Trello Helps Creators Stay Organized:
- Create boards for blog posts, videos, or social content
- Use cards for each piece of content with checklists, due dates, and notes
- Label cards by content type or status. Idea, Draft, Published
- Drag-and-drop cards as you move through the workflow
- Attach outlines, graphics, or links directly to each card
Whether you’re working alone or with a VA, Trello gives you a bird’s-eye view of your entire content pipeline.
Pro Tip: Set up a Weekly Content board with columns for each day or task. Plan, Create, Publish, Promote. This helps you stay on track and avoid bottlenecks.
“Want a simple way to manage your entire content pipeline? Try Trello here for visual boards that keep every idea and task organized!”
Get Started Here! Trello
“Ready to drive more traffic to your blog? Download the free Blog Traffic Growth Toolkit and start implementing these proven strategies today!
Step 6: Record Short-Form Video With CapCut
Short-form video is one of the fastest ways to grow your audience, and CapCut makes it incredibly easy to get started, no editing background required. It’s a free, mobile-friendly app built for creators who want fast, polished results.
What You Can Do With CapCut:
- Shoot and edit vertical videos for TikTok, Reels, or YouTube Shorts
- Add text overlays, transitions, and music in seconds
- Use built-in templates to create trending content faster
- Auto-caption your videos for better engagement
- Export high-quality video with no watermark on mobile
If you want to add video to your content strategy without the overwhelm, CapCut is one of the best tools to start with.
Pro Tip: Record a tip or quick tutorial based on your latest blog post. Use CapCut to add text highlights and upload it as a reel to drive traffic back to your site.
“Want to create scroll-stopping short videos without editing experience? Try CapCut here for fast, high-quality edits on mobile!”
Get Started Here! CapCut
Step 7: Repurpose Blog Posts Using InVideo Free Plan
InVideo makes it easy to turn written content into short videos you can share across platforms. With the free plan, you get access to ready-made templates, AI-powered editing, and tools that help you repurpose blog posts into scroll-stopping visuals.
How InVideo Supports Repurposing:
- Paste blog text into the text-to-video tool to create auto-scripted videos
- Choose from templates built for Instagram, YouTube Shorts, and more
- Add music, transitions, and branded elements without design skills
- Export your content-ready videos with basic watermarking
- Use the AI voiceover option for quick narration
It’s a powerful way to bring your written content to life and reach new audiences with the same message.
Pro Tip: Use the intro and bullet points from a blog post to create a 60-second video summary. It’s perfect for repurposing on TikTok or LinkedIn.
“Want to turn blog posts into shareable videos in minutes? Try InVideo Free here for ready-made templates and AI-powered editing!”
Get Started Here! InVideo
Step 8: Host and Share Files With Google Drive
Content creation comes with files. Whether it’s blog drafts, images, lead magnets, or scripts, Google Drive gives you a free and reliable way to store, organize, and share everything in one place.
Why Google Drive Works for Creators:
- Store up to 15GB for free
- Share files with collaborators or VAs instantly
- Organize folders by content type, status, or platform
- Access your content from any device
- Integrate with Google Docs, Sheets, and Forms
It’s the simplest solution for managing all your content assets without worrying about losing files or sending endless email attachments.
Pro Tip: Create a Content Hub folder with subfolders for blog posts, graphics, swipe files, and lead magnets. This keeps your workflow smooth and clutter-free.
“Want a free way to store, organize, and share all your content files? Try Google Drive here for secure, anywhere access to your assets!”
Get Started Here! Google Drive
Step 9: Build a Content Calendar With Notion
Notion is one of the most flexible free tools for creators who want to stay organized. You can use it to build a custom content calendar that tracks blog posts, videos, and social content in one clean dashboard.
How to Use Notion as a Content Calendar:
- Create a database with properties like title, status, due date, and content pillar
- Use a calendar view to visualize your publishing schedule
- Add checklists or templates inside each card for consistent output
- Link to your swipe file, drafts, or finished graphics
- Track repurposing and promotion tasks for each post
Notion works like a digital workspace you can shape around your needs, whether you’re a solo creator or planning to grow a team.
Pro Tip: Duplicate a simple post template each time you plan a new piece of content. Include fields for keyword, format, CTA, and promo plan so you’re always publishing with intention.
“Want an all-in-one workspace to plan and track your content? Try Notion here for a customizable calendar that keeps every post organized!”
Get Started Here! Notion
Step 10: Track Performance With Free Google Tools
Once your content is live, it’s time to track what’s working. Google’s free tools give you valuable insights into traffic, search visibility, and user behaviour, so you can make smarter decisions about what to create next.
Key Google Tools to Use:
- Google Analytics: Tracks traffic, time on page, bounce rate, and more
- Google Search Console: Shows what keywords your blog ranks for and identifies technical issues
- Google Looker Studio: Turns data into easy-to-read visual dashboards
- Google Sheets: Let’s you log content performance, repurposing, and ideas over time
These tools help you build a feedback loop between publishing and performance. You’ll stop guessing and start creating content based on real results.
Pro Tip: Create a monthly report that highlights your top 3 blog posts, biggest traffic sources, and top-performing keywords. Use this data to plan your next content batch.

“Want all your Google tools in one connected suite? Try Google Workspace here for seamless tracking, reporting, and collaboration!”
Get Started Here! Google Workspace
Step 11: Automate Basic Tasks With Zapier
Automation doesn’t have to be complicated or expensive. With Zapier, you can connect your favourite tools and create time-saving workflows that run in the background.
What You Can Automate With Zapier:
- Auto-share new blog posts to Twitter or LinkedIn
- Save form submissions or content ideas into Trello or Notion
- Sync new leads to Google Sheets or your email tool
- Trigger reminders for weekly tasks like reviews or post checks
- Link swipe file tools like Pocket with your content board
You don’t need to code or configure anything complicated. Set up simple “if this, then that” automations to take work off your plate.
Pro Tip: Start with one zap that saves you 10 minutes a week. You’ll build momentum without feeling overwhelmed.
“Want to connect your favorite tools and save hours each week? Try Zapier here for simple automations that run in the background!”
Get Started Here! Zapier
Step 12: Keep a Swipe File With Raindrop.io
A swipe file is your secret weapon for staying inspired and never running out of ideas. Raindrop.io is a powerful bookmarking tool that lets you save and organize blog posts, headlines, and visuals as you browse. Swipe files help you work smarter, not harder, especially when you’re creating content on a tight schedule or a small budget.
How Raindrop.io Works: Save Anything
- Save articles, videos, images, PDFs, and more from anywhere online
- Organize your bookmarks with tags, folders, and collections
- Search and filter saved items instantly when you need inspiration
- Access your swipe file from any device
- Share collections with collaborators or keep them private
With one click, Raindrop.io lets you save, read, and manage the things you find on the Internet.
Pro Tip: Use tags like headlines, hooks, or email ideas in Raindrop.io. When you need inspiration, just filter and pick from your best-saved examples.
“Want to save and organize inspiration from anywhere online? Try Raindrop.io here for visual bookmarking you can access anytime!”
Get Started Here! Raindrop.io
Step 13: Upgrade Only When the System Is Working
The fastest way to waste money is by upgrading too soon. Focus on building a working system with free tools first. Once you’re consistent, organized, and clear on your workflow, you’ll know exactly where a paid upgrade can make a difference.
When It Makes Sense to Upgrade:
- You’re hitting limits. Storage, automations, and design options
- You’re consistently publishing and need to scale your output
- You want to collaborate with a VA or team
- You’ve outgrown free templates or need advanced features
- A paid plan will clearly save time or improve results
Start lean. Prove your system works. Then upgrade only where it brings you measurable value.
Pro Tip: Review your tools quarterly.
Ask: Is this tool saving me time or making me money? If not, hold off on making the payment.
“Want more storage, advanced features, and team collaboration? Try Google Workspace here for a seamless upgrade from your free Google tools!”
Get Started Here! Google Workspace
Conclusion: Start Smart With the Right Tools and a Simple System
You don’t need expensive software to launch your content strategy. With a clear plan and the right set of budget-friendly tools, you can create, publish, and grow with confidence, without burning out or overspending.
From planning your first blog post to designing visuals and repurposing content into video or email, everything you need is available in free or low-cost versions. The key is to build a system that fits your workflow and helps you stay consistent.
Pick 2 or 3 tools from this guide and set up your content workflow today. Start small, get organized, and upgrade only when you’ve proven your system works.
Ebook:
“Want to streamline your blog earnings? Download our free Monetization Tool Comparison Chart now!”